Are you stuck trying to access RemoteIoT behind a firewall on your Mac? Don’t worry, you’re not alone. Firewalls can be tricky, but with the right steps, you can seamlessly connect to RemoteIoT without breaking a sweat. Whether you’re a developer, a tech enthusiast, or just someone trying to get things done, this guide will walk you through everything you need to know.
In today’s interconnected world, remote access tools like RemoteIoT are essential for managing devices and systems from anywhere. However, firewalls can sometimes block these connections, making it challenging to work efficiently. That’s where this guide comes in. We’ll break down the process into easy-to-follow steps so you can focus on what matters most—getting the job done.
Whether you’re setting up a home network, managing IoT devices at work, or troubleshooting connectivity issues, understanding how to use RemoteIoT behind a firewall using a Mac is a game-changer. Let’s dive in and unlock the potential of your setup!
Read also:Kid And His Mom Cctv Video Viral The Story Behind The Hype
Understanding the Basics: What is RemoteIoT?
Before we dive into the nitty-gritty of using RemoteIoT behind a firewall, let’s quickly cover what RemoteIoT actually is. RemoteIoT is a powerful tool that allows you to remotely access and manage IoT devices, whether they’re in your home, office, or anywhere else. It’s like having a virtual key to your devices no matter where you are.
For Mac users, RemoteIoT offers a seamless experience with features like secure connections, easy device management, and real-time monitoring. However, firewalls can sometimes interfere with these processes, which is why learning how to navigate them is crucial. By the end of this guide, you’ll be a pro at setting up RemoteIoT even behind the toughest firewalls.
Why Firewalls Matter in RemoteIoT Setup
Firewalls are like digital bouncers—they control who gets in and who stays out. While they’re great for security, they can also block legitimate connections, especially when it comes to remote access tools like RemoteIoT. Understanding how firewalls work is the first step in overcoming these challenges.
When you try to connect to RemoteIoT from behind a firewall, the firewall may block the connection because it doesn’t recognize the traffic as safe. This is where configuring your firewall settings becomes important. By allowing specific ports and IP addresses, you can ensure that RemoteIoT works smoothly without compromising your network’s security.
Tools You’ll Need to Get Started
Before we jump into the setup process, make sure you have the following tools and resources ready:
- A Mac computer with macOS installed
- RemoteIoT software downloaded and installed
- Access to your firewall settings (either locally or via your network admin)
- A basic understanding of networking concepts like ports, IP addresses, and protocols
- A stable internet connection
Having these tools at your disposal will make the process much smoother. Don’t worry if you’re not an expert in networking—this guide will walk you through everything step by step.
Read also:Movieshub300 Your Ultimate Streaming Destination Unveiled
Step-by-Step Guide: Setting Up RemoteIoT Behind a Firewall
Step 1: Install RemoteIoT on Your Mac
The first step is to download and install RemoteIoT on your Mac. Head over to the official website, grab the latest version, and follow the installation instructions. Once installed, launch the app and create an account if you haven’t already.
Step 2: Identify the Required Ports
RemoteIoT uses specific ports to establish connections. These ports vary depending on the version and configuration, so it’s important to check the documentation. Common ports include:
- Port 80 (HTTP)
- Port 443 (HTTPS)
- Port 22 (SSH)
Make a note of these ports, as you’ll need them when configuring your firewall.
Step 3: Configure Your Firewall Settings
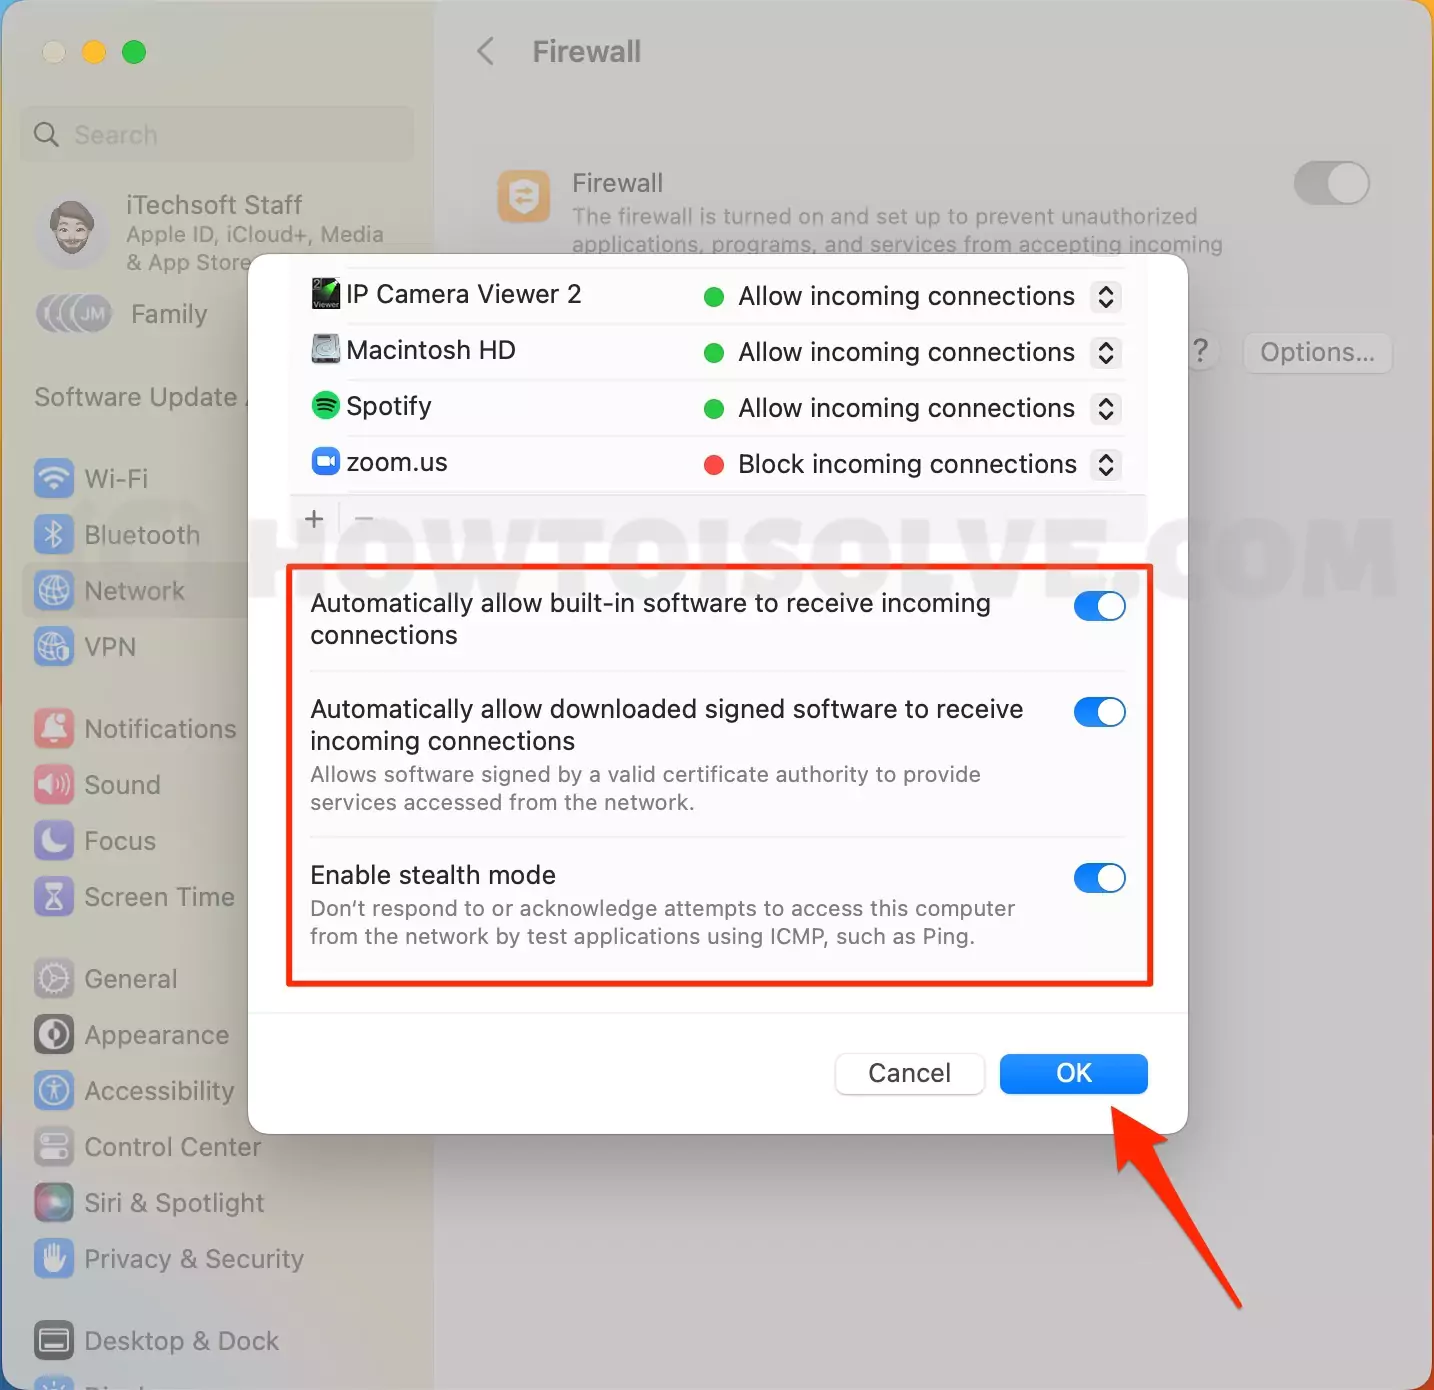
Now it’s time to adjust your firewall settings. If you’re using macOS’s built-in firewall, open System Preferences > Security & Privacy > Firewall. Click the lock icon to make changes, then add RemoteIoT to the list of allowed applications.
If you’re using a third-party firewall or a router-based firewall, log in to your admin panel and create rules to allow traffic on the required ports. Be sure to specify both inbound and outbound traffic to ensure smooth connectivity.
Step 4: Test the Connection
After configuring your firewall, it’s time to test the connection. Open RemoteIoT on your Mac and try connecting to one of your devices. If everything is set up correctly, you should be able to access it without any issues.
Step 5: Troubleshoot Common Issues
If you’re still having trouble, don’t panic. Here are a few common issues and how to fix them:
- Firewall Blocking Traffic: Double-check your firewall settings to ensure all required ports are open.
- Incorrect IP Address: Verify that you’re using the correct IP address for your device.
- Network Configuration Issues: Restart your router and modem to reset the network settings.
By systematically addressing these issues, you’ll be back up and running in no time.
Advanced Techniques for Enhanced Connectivity
Once you’ve mastered the basics, you can explore advanced techniques to enhance your RemoteIoT setup. Here are a few tips:
- Use Port Forwarding: Configure your router to forward specific ports to your device’s IP address.
- Enable SSH Tunneling: Create a secure tunnel between your Mac and the device for added security.
- Implement Dynamic DNS: Use a dynamic DNS service to simplify remote access when your IP address changes.
These techniques can significantly improve your RemoteIoT experience, especially when dealing with complex networks or strict firewalls.
Best Practices for Secure RemoteIoT Access
Security should always be a top priority when using remote access tools. Here are some best practices to keep your setup secure:
- Use strong passwords and enable two-factor authentication (2FA).
- Regularly update RemoteIoT and your firewall software to patch vulnerabilities.
- Limit access to trusted devices and users only.
By following these practices, you can enjoy the benefits of RemoteIoT without compromising your network’s security.
Real-World Applications of RemoteIoT
RemoteIoT isn’t just for tech enthusiasts—it has practical applications in various industries. Here are a few examples:
- Home Automation: Control smart home devices from anywhere.
- Industrial IoT: Monitor and manage industrial equipment in real time.
- Healthcare: Remotely access medical devices for diagnostics and maintenance.
With its versatility and ease of use, RemoteIoT is becoming an indispensable tool for professionals and hobbyists alike.
Common Mistakes to Avoid
While setting up RemoteIoT behind a firewall, there are a few common mistakes to watch out for:
- Ignoring Firewall Settings: Failing to configure your firewall properly can lead to connection issues.
- Using Weak Passwords: Weak passwords make your setup vulnerable to unauthorized access.
- Not Testing the Connection: Always test your connection after making changes to ensure everything works as expected.
Avoiding these mistakes will save you time and frustration in the long run.
Conclusion: Mastering RemoteIoT Behind a Firewall
In this guide, we’ve covered everything you need to know about using RemoteIoT behind a firewall using a Mac. From understanding the basics to advanced techniques, you now have the tools and knowledge to set up a secure and efficient remote access system.
Remember, the key to success is patience and persistence. If you encounter any issues, take a deep breath and troubleshoot systematically. And don’t forget to share your experience with others—your insights could help someone else overcome similar challenges.
So, what are you waiting for? Dive in, experiment, and unlock the full potential of RemoteIoT today!
Table of Contents
Understanding the Basics: What is RemoteIoT?
Why Firewalls Matter in RemoteIoT Setup
Tools You’ll Need to Get Started
Step-by-Step Guide: Setting Up RemoteIoT Behind a Firewall
Advanced Techniques for Enhanced Connectivity
Best Practices for Secure RemoteIoT Access